
Stargazing
Star Trail Photography for Beginners: Capturing the Turning Sky at Twilight
October 03, 2026
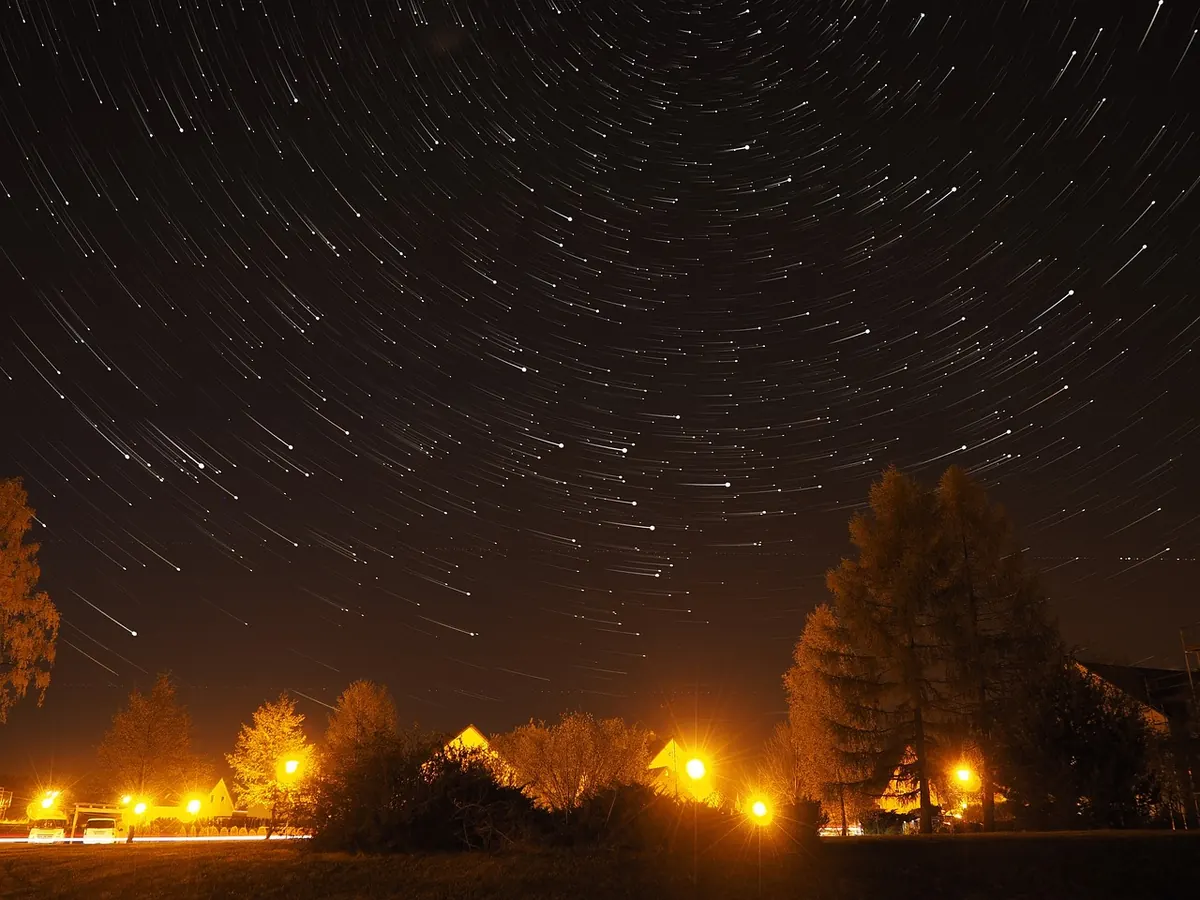
The best star trail photographs rarely begin in pitch darkness. They begin an hour or so after sunset, when the sky has turned a deep electric blue and the first stars are bright enough to focus on with confidence. Start then and you still have a lit foreground, a horizon you can actually see, and a sequence of frames that slides gently from dusk into true night.
There is a second reason to begin early. For much of the UK, midsummer never gets fully dark, and even in spring and autumn the usable window is short. Folding twilight into the shoot buys you an extra hour of sky — and gives the final image a background with depth instead of a flat black rectangle with white lines scratched across it.
Why twilight is the best place to begin
Three things work in your favour as the light fades. The foreground — a church tower, a stand of pines, a breakwater — is still lit enough to hold detail, so you can skip light painting on your first attempt. You can compose and focus while you can still see your own feet. And the sky itself keeps some colour rather than going uniformly inky.
One technical point explains the last one. When you stack frames with a blending mode that keeps the brightest pixel from each, the sky in the finished picture is drawn largely from the brightest frame in the run — usually your first. So the blue you see on the back of the camera at 10pm, roughly speaking, is the blue you will end up with. Faint stars still register perfectly well against it.
The kit that earns its place
You do not need expensive gear. A basic camera with its 18–55mm kit lens will produce a good first set of trails at 18mm and f/3.5. What matters is that nothing moves and nothing dies halfway through.
- A tripod you trust. Hang your bag from the hook to weigh it down, and avoid extending the centre column if you can.
- A way to trigger frames automatically. An intervalometer, or the interval timer built into most modern cameras. Taping down a remote shutter works for a while, but you will be standing there for hours.
- Spare batteries and a large card. Cold drains batteries quickly, and a three-hour run at 20-second exposures is a few hundred RAW files.
- A cloth, a lens hood, and warm clothing. Dew forms within an hour of sunset, and standing in a field at 2am is colder than you expect. A flask helps enormously.
Settings to lock in and leave alone
Put the camera in manual mode and settle on a set of numbers before the light goes. Choose them once; changing them mid-run makes trails jump in brightness and leaves visible steps in the arc.
- Aperture: wide open, or one stop down — f/2.8 to f/4 is the usual range.
- ISO: 800 to 3200. Higher ISO shows fainter trails but adds noise; lower ISO is cleaner but loses the dimmer stars.
- Shutter speed: 15 to 30 seconds. For trails you do not need the short exposures that keep stars sharp — the size of the gaps between frames matters far more than the length of each one.
- White balance: fixed, around 3800K or Daylight. Auto white balance shifts colour slightly from frame to frame.
- Switched off: long exposure noise reduction, image stabilisation, auto power off and automatic image review. The first of these doubles the time between frames and turns a smooth trail into a dotted one.
- Focus: manual, using live view magnified on a bright star. Once it is sharp, tape the focus ring so it cannot drift.
Shooting the run
Point the camera, set the interval to one second — some cameras cope with none at all, but a small gap protects against buffering — and start. Then leave it alone.
Do not chase the falling light. Frames taken later in the night will be darker, which is fine; the trails still sit above the noise. If the twilight sky is clipping to white in your first frames, your exposure was too generous from the start, so drop the ISO one stop and keep it there for the whole sequence.
Length matters. Stars sweep roughly 15 degrees per hour, so a two-hour run gives a 30-degree arc and four hours gives a generous curve across the frame. A complete circle would need a full day of shooting, so aim for a long, elegant arc rather than a closed ring.
Stacking the frames into one picture
Free software does this beautifully. StarStaX runs on Mac and Windows, Sequator is Windows-only, and Photoshop, Affinity Photo or GIMP will manage it through layer blending. The principle is always the same: each pixel keeps the brightest value found across the whole set, so the single moment each star passed through a given point survives, and the trails join up.
Adjust one frame to taste, apply the same settings to the rest in a batch, and export as TIFF or JPEG. Load the folder into the stacking program. Lighten mode gives clean, even trails; StarStaX also offers a comet mode that tapers each trail towards the star's direction of travel, which suits a sky with lots of bright stars in it. Finish the stacked file in an editor: lift the foreground shadows, hold back the highlights, and clean up noise.
Dark bands between frames mean your interval was too long, or noise reduction was still switched on. Dotted trails are almost always a settings problem rather than a failing camera.
Composition: where to point and what to put in front
Facing north produces the familiar concentric circles. Find Polaris using the two pointer stars at the end of the Plough, then frame it off-centre — a little to the left or right and low in the sky gives the trails room to curl. Facing east or west, trails rise or set at a steep diagonal; facing south, you get a wide spread of arcs across the frame.
Then add something in front. A silhouette is enough: a lone oak, a stone circle, a pier, a windmill, a line of rooftops. Keep the horizon level and leave space above it. If the foreground is too dark once stacked, take one extra frame early in the run with a torch sweeping across the subject, then blend that frame underneath the stack later.
A first attempt, planned out
- Check the moon phase. A crescent or half moon lights a foreground beautifully; a full moon washes out faint stars, and a new moon leaves everything black.
- Arrive before sunset, set up, compose and focus while there is still light. Take a test frame at ISO 6400 to check the framing.
- Start the interval and check the tenth frame on the rear screen. Confirm the histogram is not clipped and the stars are round and sharp.
- Let it run for at least two hours. Then stop, pack up, and stack the frames the following morning with a pot of coffee.
The first attempt rarely produces a masterpiece, but it will teach you more than any amount of reading: how fast the light drops, how quickly the lens dews up, and how much better a trail looks when it starts in blue rather than black.
Photo: PTNorbert / Pixabay
Related posts
More stories you’ll love reading